

Here at Lofty Labs, we kick off new projects all the time. Whether it's another component in a client's service-oriented architecture, a project prototype, or an internal tool, getting started quickly is a required skill to best serve our customers.
I've compiled a list of 6 must-do housekeeping steps when kicking off a new Django project. Many of these tips have been collected from other development teams and mentors that I've worked with over the past decade using Django.
1. Local Settings Override
Adding a local settings override will give you the ability to set local-only configuration for your project without clobbering the rest of your settings.
try:
from settings_local import *
except ImportError:
pass
Add the above code snippet to your main project settings file, and then set up any local-specific configuration in settings_local.py. By adding this to the main project settings file, you won't have to specify a local settings path each time you use manage.py.
Be sure to add it to your .gitignore file, but it's nice to keep an example file in your repository so other developers have a reference point on how to get started. I usually call this file settings_local.py.example.
2. Test-Specific Configuration Stanza
There's a quick and easy way to add a logical block to your settings file to set certain configuration details only when tests are running:
import sys
if 'test' in sys.argv:
# Add your test-specific configuration here
What kinds of configuration goes here? A couple of go-to overrides I usually add are:
- Dummy email backends
- Test specific database backend
Setting EMAIL_BACKEND = 'django.core.mail.backends.console' is usually a good idea. There's a special kind of terror that only occurs when your test suite sends emails to all of your users.
Test specific database config can be nice, for example to use SQLite during test runs for faster tests. This, of course, is contingent on your code being database backend agnostic. For example, there is not one to one behavior parity between the SQLite and Postgres backends. (order_by('?') and datetime to datecoercion on DateField come to mind) .
3. Set up coverage.py
Coverage.py is a must when you start working on a project if you want to ensure good test coverage from day one. If you check coverage when you run your tests, you are far more likely to maintain a high coverage (90%+) application than if you try and add test coverage later in the development cycle.
My standard .coveragerc configuration file looks something like this:
[run]
branch = true
omit = */tests/*, */tests.py, */migrations/*, */urls.py, */settings/*, */wsgi.py, manage.py, fabfile.py
source = .
[report]
show_missing = true
This will exclude things like Django migrations and other automated / non-logical files that throw off your test coverage counts.
4. Install iPython
IPython is an alternate (interactive) Python shell that offers lots of features which make working in a Python shell more pleasant, including:
- Input history (persistent across sessions)
- Syntax highlighting
- Tab completion
- Object introspection
When iPython is installed, Django will automatically use it when you run ./manage.py shell.
It also functions as a kernel for Jupiter notebooks. More on that in number...
5. Install django-extensions (for the iPython notebooks)
Django-extensions is a package which adds some extra features to Django's built in management commands, and some custom commands.
Personally, I'm not interested in most of them (see an exhaustive list here), but there's one feature I really do like, which is its integration with Jupyter notebooks.
Run ./manage.py shell_plus --notebook to fire up a Jupyter server, and notice that there's a special notebook called "Django Shell-Plus". This will spin up a notebook that has the Django environment configured, just as if you had run ./manage.py shell.
The next time you need to demo a CLI process or run some maintenance scripts, you'll find yourself using notebooks rather than keying code into a shell or building esoteric management commands.
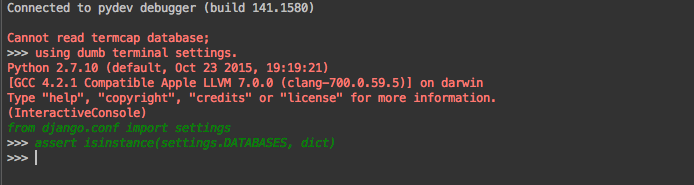
6. Configure PyCharm with a Django Shell Debugger
You are using PyCharm, right?
PyCharm's default run/debug setup for Django projects attaches a debugger to the `runserver` command. While that can be sufficient in some cases, it's ineffective for any code that isn't directly exposed by a Django view.
See our post from earlier this year on configuring PyCharm to debug a Django shell. With this debug profile in place you can set a breakpoint, import the code and debug quickly from an interpreter.
Have a tip you use when you start up a new Django project? Let us know in the comments!
service-oriented

.jpg)

